
From Table To Wall: How To Frame Your Finished Wooden Puzzle
- Nov 14, 2025
- 3 min read
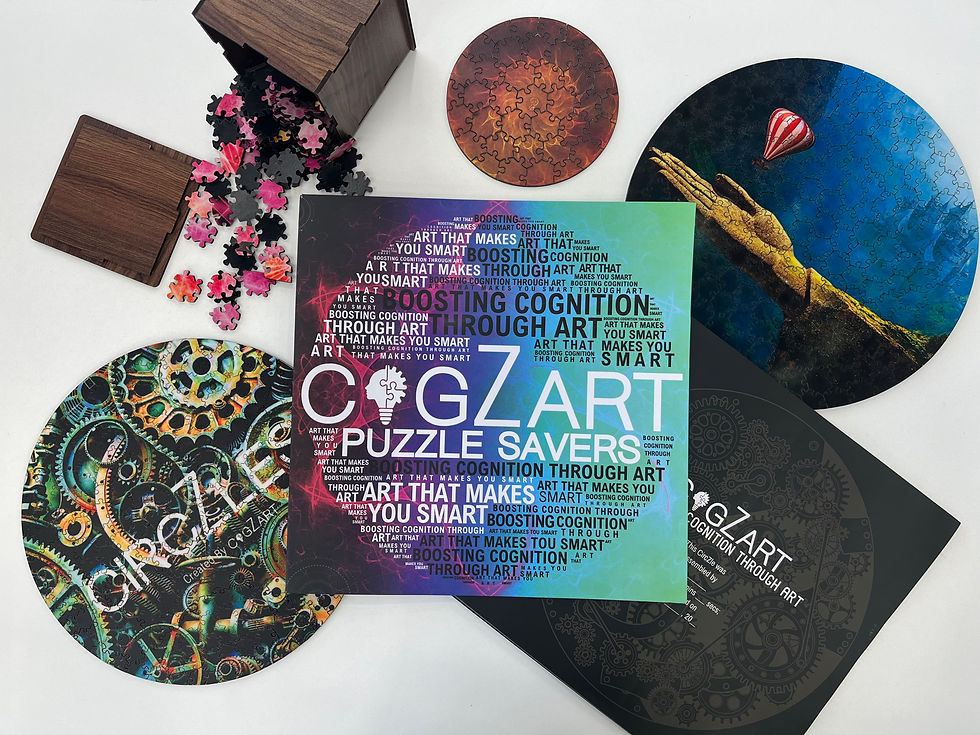
Mount and frame your finished wooden puzzle with the universal puzzle saver board. A clean peel and stick system with zero glue, plus a step by step guide for flawless wall ready art.
You placed the last piece and the room exhaled. Now turn that win into wall art. The universal puzzle saver board makes it simple to mount and frame your finished wooden puzzle. No glue, no warping, no stress. Just peel, stick, and hang with a clean, gallery ready finish.
Universal Puzzle Saver Board What It Does
This premium backing sheet grips every piece evenly so colors stay rich and edges stay crisp. It is designed for wooden jigsaw puzzles for adults and handles unique silhouettes with ease. The result is fast display, durable hold, and a look that feels intentionally framed.
Why Puzzlers Love It
• No glue, just peel and stick
• Smooth, even adhesion that protects the print
• Perfect for round or intricate layouts
• Ready for float frames, shadow boxes, or direct wall mounting
• Ideal for DIY puzzle decor and gift ready presentation
Step-by-Step How To Use The Universal Puzzle Saver Board
Follow this clear process for a flawless mount. Work on a clean, flat surface with good light.
Flip and secure the board Place the saver board next to your completed wooden puzzle and tape it to the table as indicated. Tip: Press the tape firmly so the board stays put and the cover aligns cleanly.
Slide to the first fold Gently slide the wooden puzzle onto the saver board until it reaches the first fold line. Tip: Keep the board at a slight angle for a smooth slide, not too steep, or an unstuck puzzle can separate.
Close and flip in one motion Close the cover. Hold the top and bottom with both hands and flip the puzzle over in one swift, controlled motion.
Open the cover Your wooden puzzle will now face down. The back is up and ready for mounting.
Pick your saver sheet size Choose the correct saver sheet for your wooden puzzle. Peel the saver from its backing.
Place from the center out Lay the saver onto the puzzle starting at the center and moving outward as shown.
Smooth and set Smooth the sheet from the center to the edges. Remove any air bubbles with steady hand strokes. Tip: A rolling pin gives excellent, even adhesion.
Trim the excess Trim away extra sheet. You do not need to match the shape perfectly. Make sure every single piece has contact with the saver.
Fix missed edges If an edge is missed, use trimmed corners as patches to secure it.
Add the backing tape Apply the provided tape along the bottom of the sticker sheet, fold over, and press onto the back of your wooden puzzle. Any quality double-sided tape works.
Mount on the wall Secure your wooden puzzle to a smooth, clean wall for a lasting hold and a crisp look.
Step back and enjoy Admire your masterpiece. You earned it.

Framing Tips For A Gallery Finish
• Choose a float mount or shadow box to highlight the subtle depth of wood
• Use UV protective, non glare acrylic to keep color rich and reflections soft
• Add spacers so the glazing never touches the puzzle surface
• Center the layout evenly for balanced negative space
Make It Look Exceptional
Dust the surface with a dry microfiber cloth before mounting. If framing, use acid free backing and a clean, neutral mat so the artwork leads. For a series, align margins precisely and keep frame styles consistent for a curated wall.
Care After Mounting
Avoid direct sunlight, wipe the acrylic with a soft cloth only, and keep humidity stable for long term flatness and color fidelity.
Citations
Why spacers matter (prevents glazing contact/damage). Frame Destination
Additional framing references on spacer function and preservation. frametek.com+1


Comments